To configure the NewBook API Integration in Idealpos, complete the steps outlined below:
Note!
Any sites that are currently using the NewBook File Interface will need to contact NewBook and request for their account to be upgraded to the API version in order to use the API Interface.
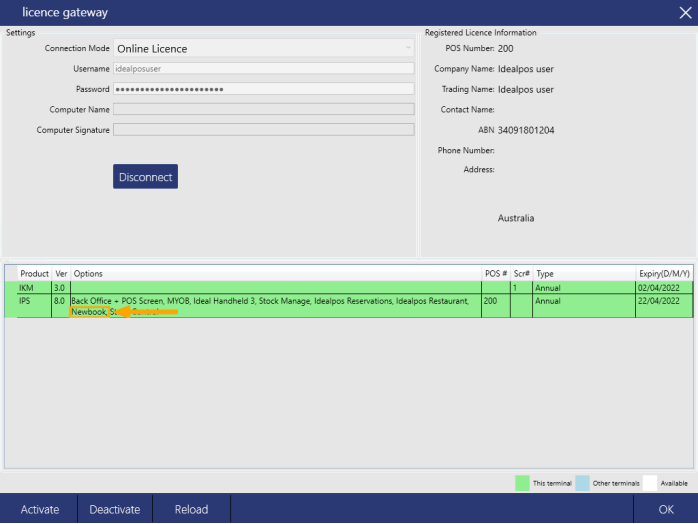
Before continuing with the configuration process for NewBook, ensure that the NewBook module has been enabled in the Licence Gateway on each POS Terminal that will utilise this integration.
If the Options column does not currently have the NewBook module listed, please contact Idealpos or your Reseller to purchase this module.
Go to: Back Office > Setup > Function Descriptors
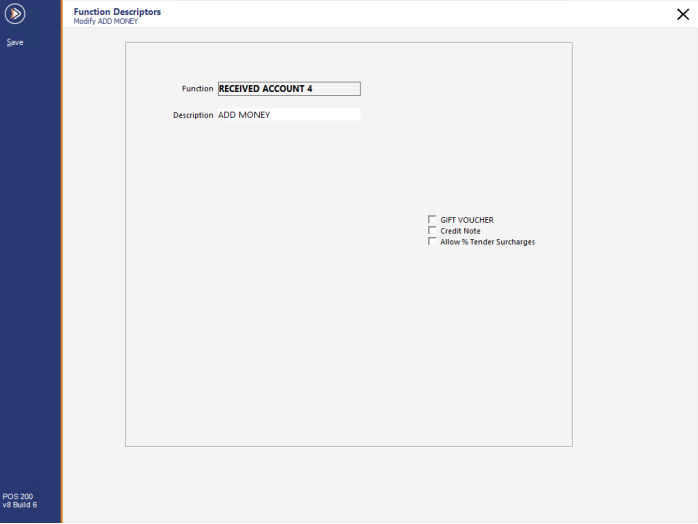
Select an unused Received Account function (unused Received Account Functions will show as "RA #", where # will show a number between 1 and 4) and assign it to "Add Money".
This Received Account will be used to add money to the eWallet for the NewBook Guest
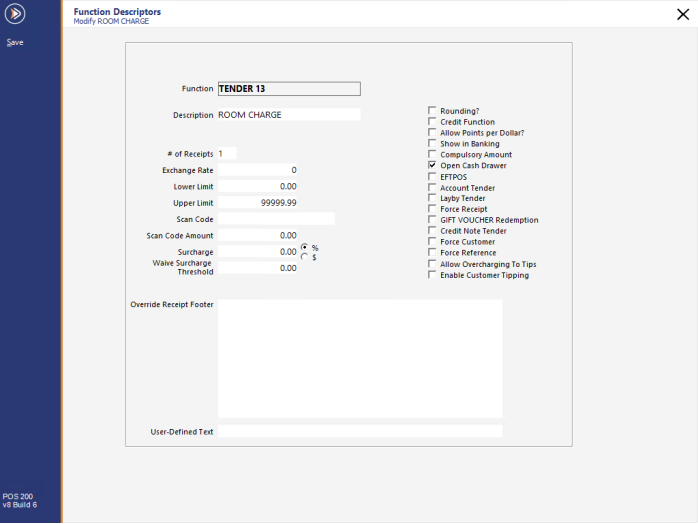
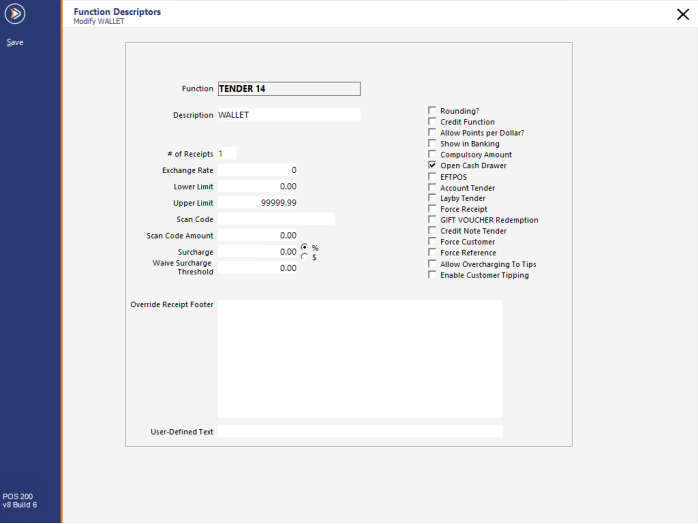
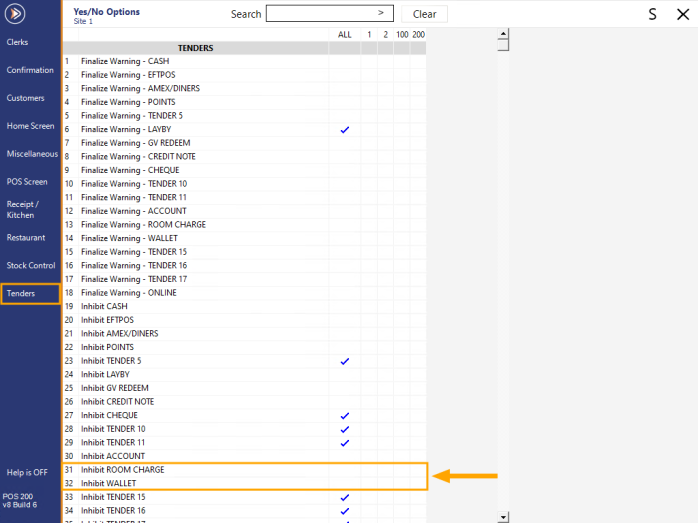
Select two unused Tender Functions and enter a Description of "Room Charge" and "Wallet".
Note!
Unused Tenders will have a Description showing as "TENDER ##", where # will show a number between 1 and 18 (e.g. TENDER 13).
When setting up the Room Charge and Wallet Tenders, ensure that you select unused Tenders that aren't currently being used for another function.
The Room Charge Tender will be used for charging against the Guest's Room.
The Wallet Tender will be used for redeeming value from the NewBook Guest's eWallet.
When setting up the Tenders, enable any checkboxes that you require for each Tender (e.g. Show in Banking, Open Cash Drawer, etc.)
One or more buttons need to be created for adding value to the eWallet.
Go to: Back Office > Setup > POS Screen > POS Screen Setup
Select POS Screen Layout > Buttons.
Select a blank button on the POS Screen and configure as follows:
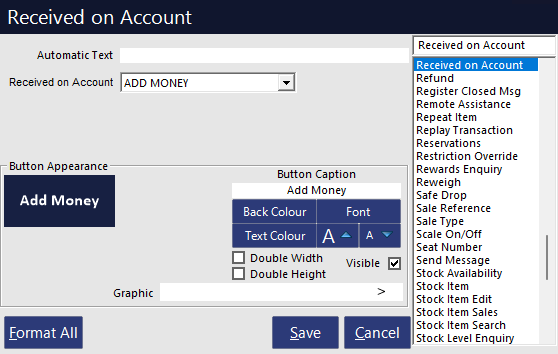
Function: Received on Account
Received on Account: ADD MONEY [select the Received Account function configured above]
Automatic Text: This is optional. If left as blank, you will need to enter the value to add to the Wallet before pressing the button.
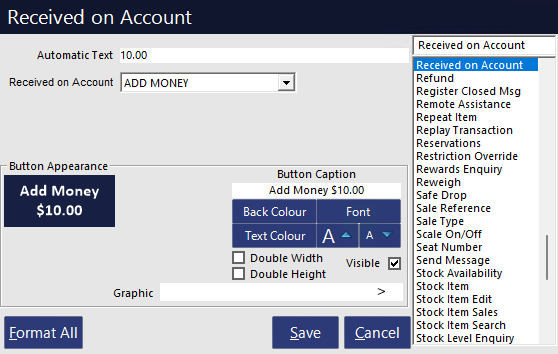
If you enter a value into the Automatic Text field, the entered value will be used when pressing the button. If desired, multiple Add Money buttons can be created, each with a different amount entered into the Automatic Text field.
An example showing the Received on Account with a pre-configured amount of $10.00 in the Automatic Text field:
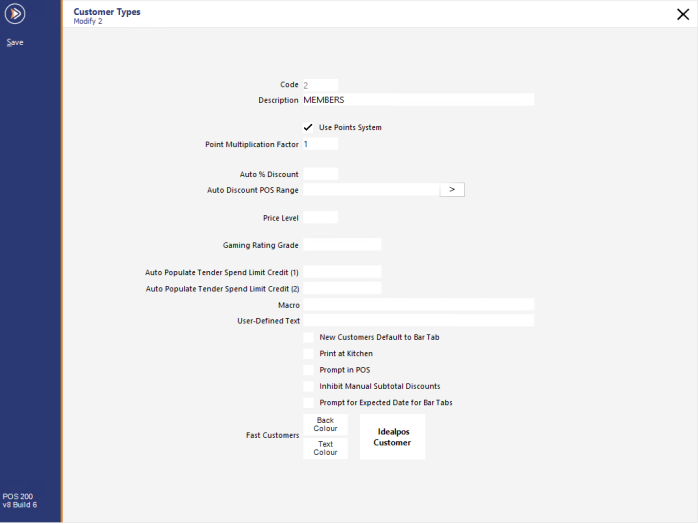
Create a Customer Type if one doesn't already exist which will be used for NewBook customers.
Go to: Back Office > File > Customers > Customer Types
Press the "Add" button on the top-left corner of the window, create the Customer Type and enable any settings as required.
Further details about creating Customer Types can be found in the Customer Types topic by clicking here.
Go to: Back Office > Setup > Global Options > Interfaces.
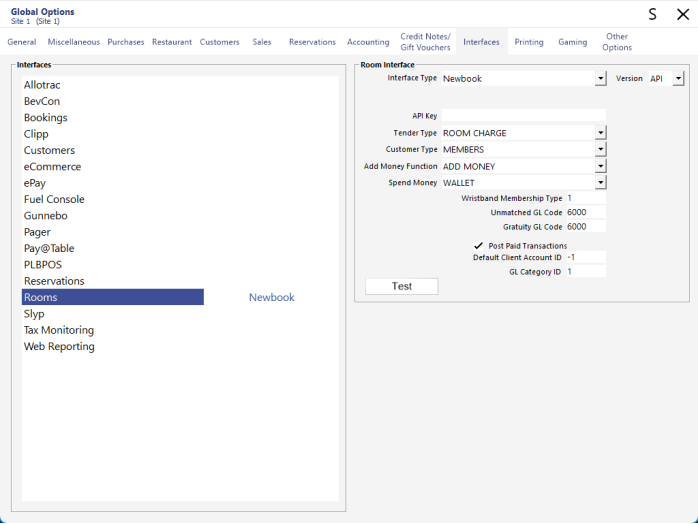
Select the Rooms option and configure as follows:
Interface Type: Newbook
Version: API
API Key: [Enter the API Key supplied by Idealpos]
Tender Type: ROOM CHARGE [select the Room Charge Tender that was configured during the Function Descriptor configuration step]
Customer Type: MEMBERS [or select the Customer Type that was configured during the Customer Type configuration step]
Add Money Function: ADD MONEY [or select the Received Account Function that was configured during the Function Descriptor configuration step - this is used for adding money to the eWallet]
Spend Money: WALLET [or select the Tender that was configured during the Function Descriptor configuration step - this is used for tendering or redeeming the money from the NewBook Guest's eWallet]
Wristband Membership Type: 1
Unmatched GL Code: 6000 (whether using this GL Code or another GL Code of your own preference, ensure that the GL Code exists in your NewBook settings which can typically be accessed by logging into the NewBook website). Idealpos Departments should also match the GL Codes.
Gratuity GL Code: 6000 (whether using this GL Code or another GL Code of your own preference, ensure that the GL Code exists in your NewBook settings which can typically be accessed by logging into the NewBook website). Idealpos Departments should also match the GL Codes.
Post Paid Transactions: Enabled
Default Client Account ID: -1
GL Category ID: Enter the Newbook GL Category ID to where the Newbook Transactions will be posted to.
Room Search by: Select Room Name or POS Identifier.
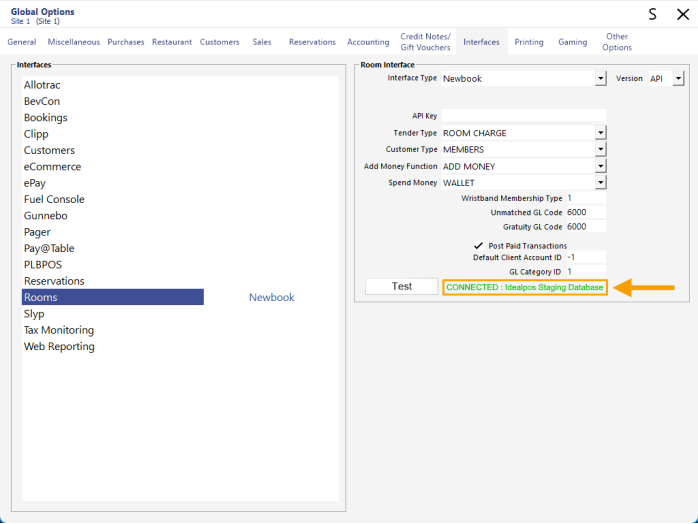
Once configured, press the "Test" button to establish and test the connection.
A connection should be established successfully, and this is reflected in a response next to the Test button, as shown in the example below: